Security policy
Customizing user roles
The system uses the concept of User. A user is an object that contains information about one person working in the system.
The functionality available to a User is determined by their Role or list of Roles. The Role determines which forms, fields, and buttons are available.
The User’s card (Administration > Security > Users) indicates which roles are assigned to the user (Fig. 1.).
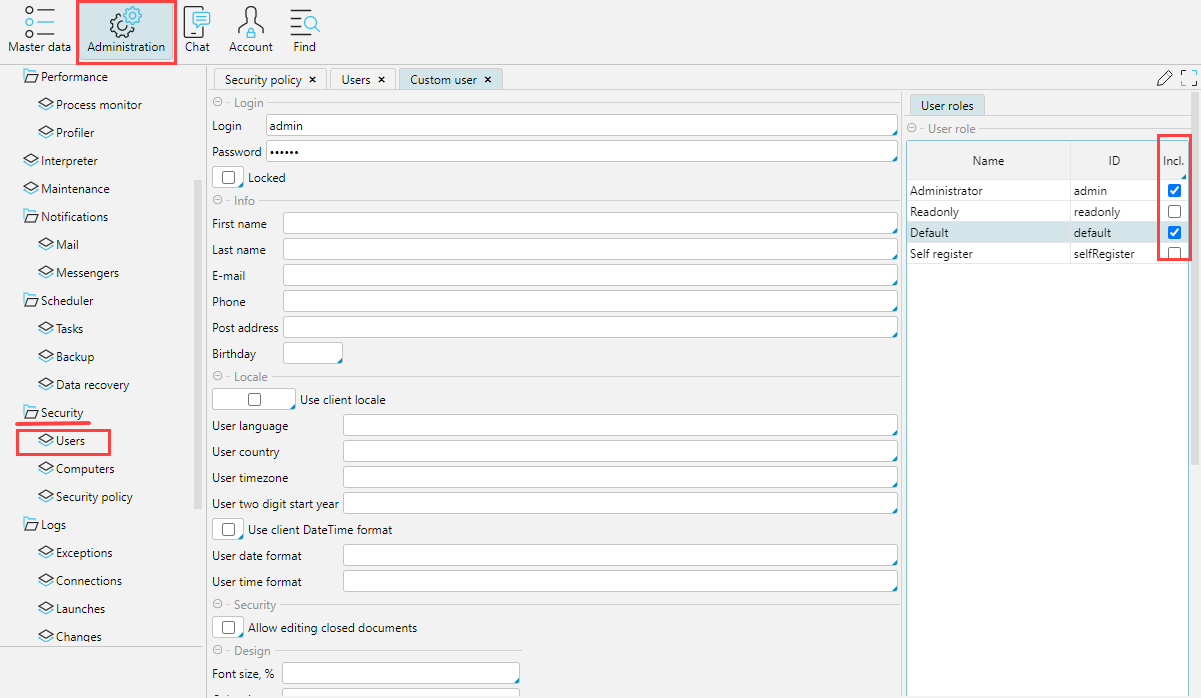
Fig. 1. Assigning Employee Roles
Setting access to system elements
The security policy for each Role is configured in the Administration > Security > Security Policy. This is where the composition of Roles is determined, using the Add, Delete, and Copy buttons. When a Role is copied, all rights are copied too.
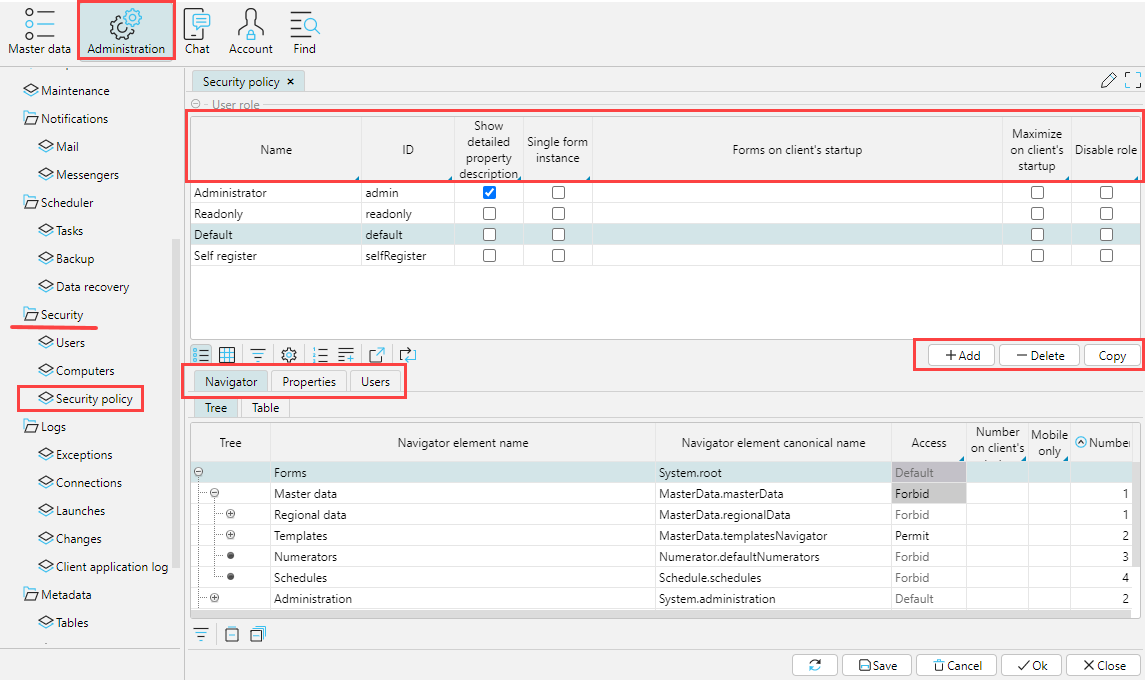
Fig. 2. Configuring security policy by role
For each Role you need to specify a name (Name) and a code (Code), and you can also set the following parameters:
Show detailed property description– if you hover over a property, button, field, etc., a description will be displayed in a popup window.
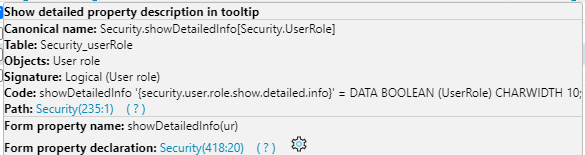
Fig. 3. Detailed property description
Single form instance- when selecting a form already open on the desktop in the navigator, the user will go to it, no additional window will be opened. If there is a need to open several windows with this form, it is necessary to hold theCtrlkey when calling the form. This restriction can also be set for a specific user on theUserstab.Forms on client’s startup- for a role it is possible to define the forms that will be opened immediately after the user logs into the program. For this purpose, on theNavigatortab, in theNumber on client’s startupfield for the required forms the number in order is specified (see Fig. 2).Maximize on client's startup- on logging in, the program will be opened in the full screen mode ( the navigation menu will be hidden)Disable role- access rights configured for the role will not be applicable.
Navigator Tab
The Navigator tab displays all Forms that exist in the system. They are displayed either as a tree or as a table. In the tree view, the list of forms reflects the structure of existing modules and is most convenient to control access to them.
You can set one of three statuses for each form in the Access column:
Permit – a user can access the form
Forbid – a user cannot access the form
Default - the form will be available by default to the user with the given role. If a user has multiple roles, the form will be available if there is Permit or no Forbid among these roles.
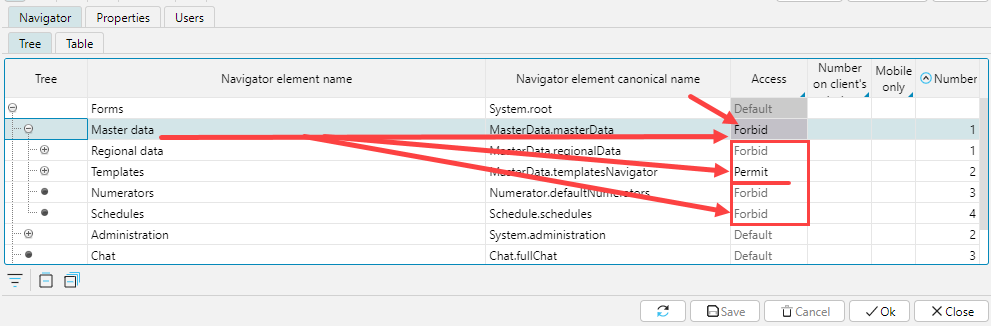
Fig. 4. Example of configuring access to forms
The status set for a tree branch automatically applies to child branches. If necessary, a child branch can be set to a different access status, in which case the status of the parent element will be highlighted with a gray background, so that the user can visually determine that there are elements with a different access status in the structure of this branch. According to the settings shown in Fig. 4 only Templates forms are available to the user in the Master data menu.
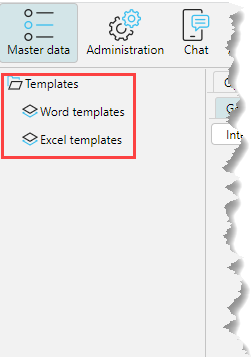
Fig. 5. Result of setting access to forms
Properties Tab
The Properties tab displays all the form elements available in the system: fields, buttons, checkboxes, etc. Like the Forms themselves, Properties are presented in tree and table form.
A role can have one of three access statuses for actions on properties:
View – defines whether the property is visible to a user
Change - defines whether a user can change the value of the property
Follow – if the property value is an object, defines whether a user can access the object to change it
The access status for Properties is set in the same way as for Forms. However, given the large number of different properties in the application, on the Properties tab it is convenient to define the access level to the property group corresponding to the upper branches of the tree, or to view the status of role permissions in terms of properties.
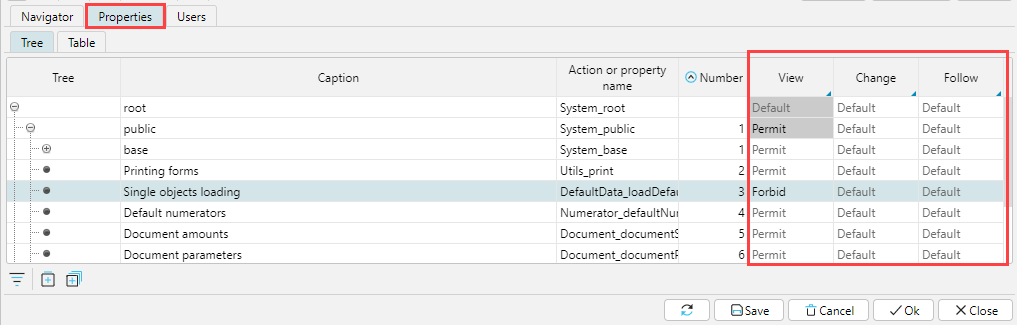
Fig. 6. Managing access rights to properties
To set up access rights to a particular property on a form, it is convenient to use the context menu. To do this, right-click on the button or field you want to configure and select Setup property policy in the context menu. The Security policy window will open, where you can set the access level to the property for each role or for several roles, then click OK. All changes made and saved via the context menu are also displayed on the Properties tab of the Security Policy form.
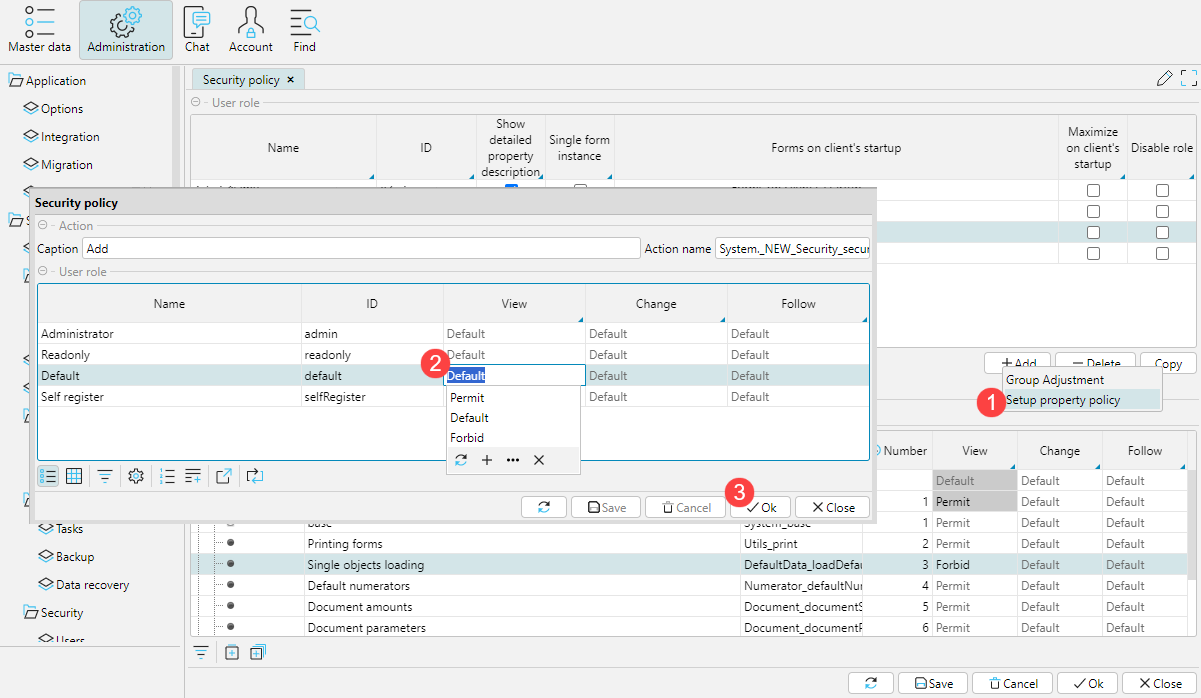
Fig. 7. Option for configuring access to an individual property
Users Tab
This tab displays all the users to whom the highlited role is assigned as a primary or secondary role.
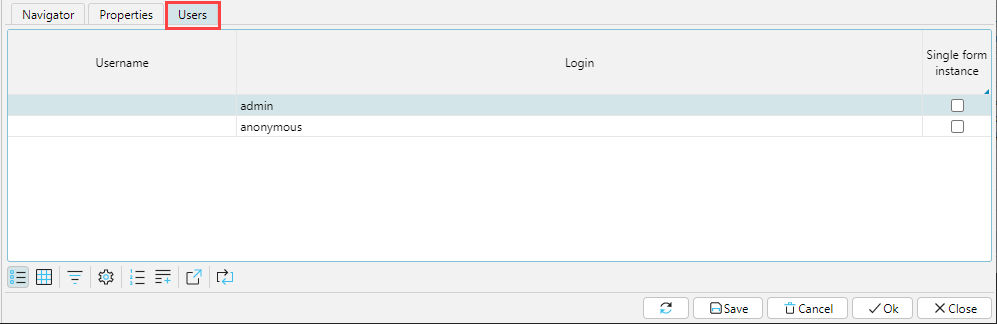 Fig. 8 . Users tab
All changes made on the Security policy form are activated after the next user login.
By default, there are 4 roles pre-installed in the platform:
- Administrator (admin)
- Readonly (readonly)
- Default (default)
- Self register (selfregistar)
Note that when set for a form or property, Default access applies permission or restriction, depending on the additional roles set. The set Default access does not apply the value specified in the Default role settings. To have the accesses configured in the Default role applied to a user, the user must be assigned that role.